Equivalence Class Testing: A Complete Guide
Every non-trivial application has more possible input combinations than any team can test exhaustively. Equivalence class testing is a systematic technique that solves this problem by grouping inputs into classes that are expected to behave the same way — and then testing one representative value from each class instead of every possible value.
In this guide, we will walk through the concept, build real equivalence class tables, compare it with boundary value analysis, and show how to automate the entire process with Nanook.
What Is Equivalence Class Testing?
Equivalence class testing — also called equivalence partitioning or equivalence class partitioning — is a black-box test design technique. The core idea is simple: if two input values are expected to produce the same behavior, testing both is redundant. Instead, you divide the input domain into equivalence classes and test one representative from each.
For example, if a form field accepts ages 18–120, then 25, 42, and 99 are all in the same equivalence class: “valid age.” Testing all three gives you no additional information. Testing one is enough.
This technique is part of the ISTQB Foundation Level syllabus and is one of the most widely taught test design methods. Its power lies in dramatically reducing the number of test cases while maintaining meaningful coverage.
How Equivalence Class Partitioning Works
Step 1: Identify Input Fields and Their Domains
Consider a user registration form with three fields:
- Age — numeric, must be 18–120
- Email — must be a valid email format
- Country — must be from a list of supported countries
Each field has a domain of possible values. Our job is to partition each domain into equivalence classes.
Step 2: Define Valid and Invalid Classes
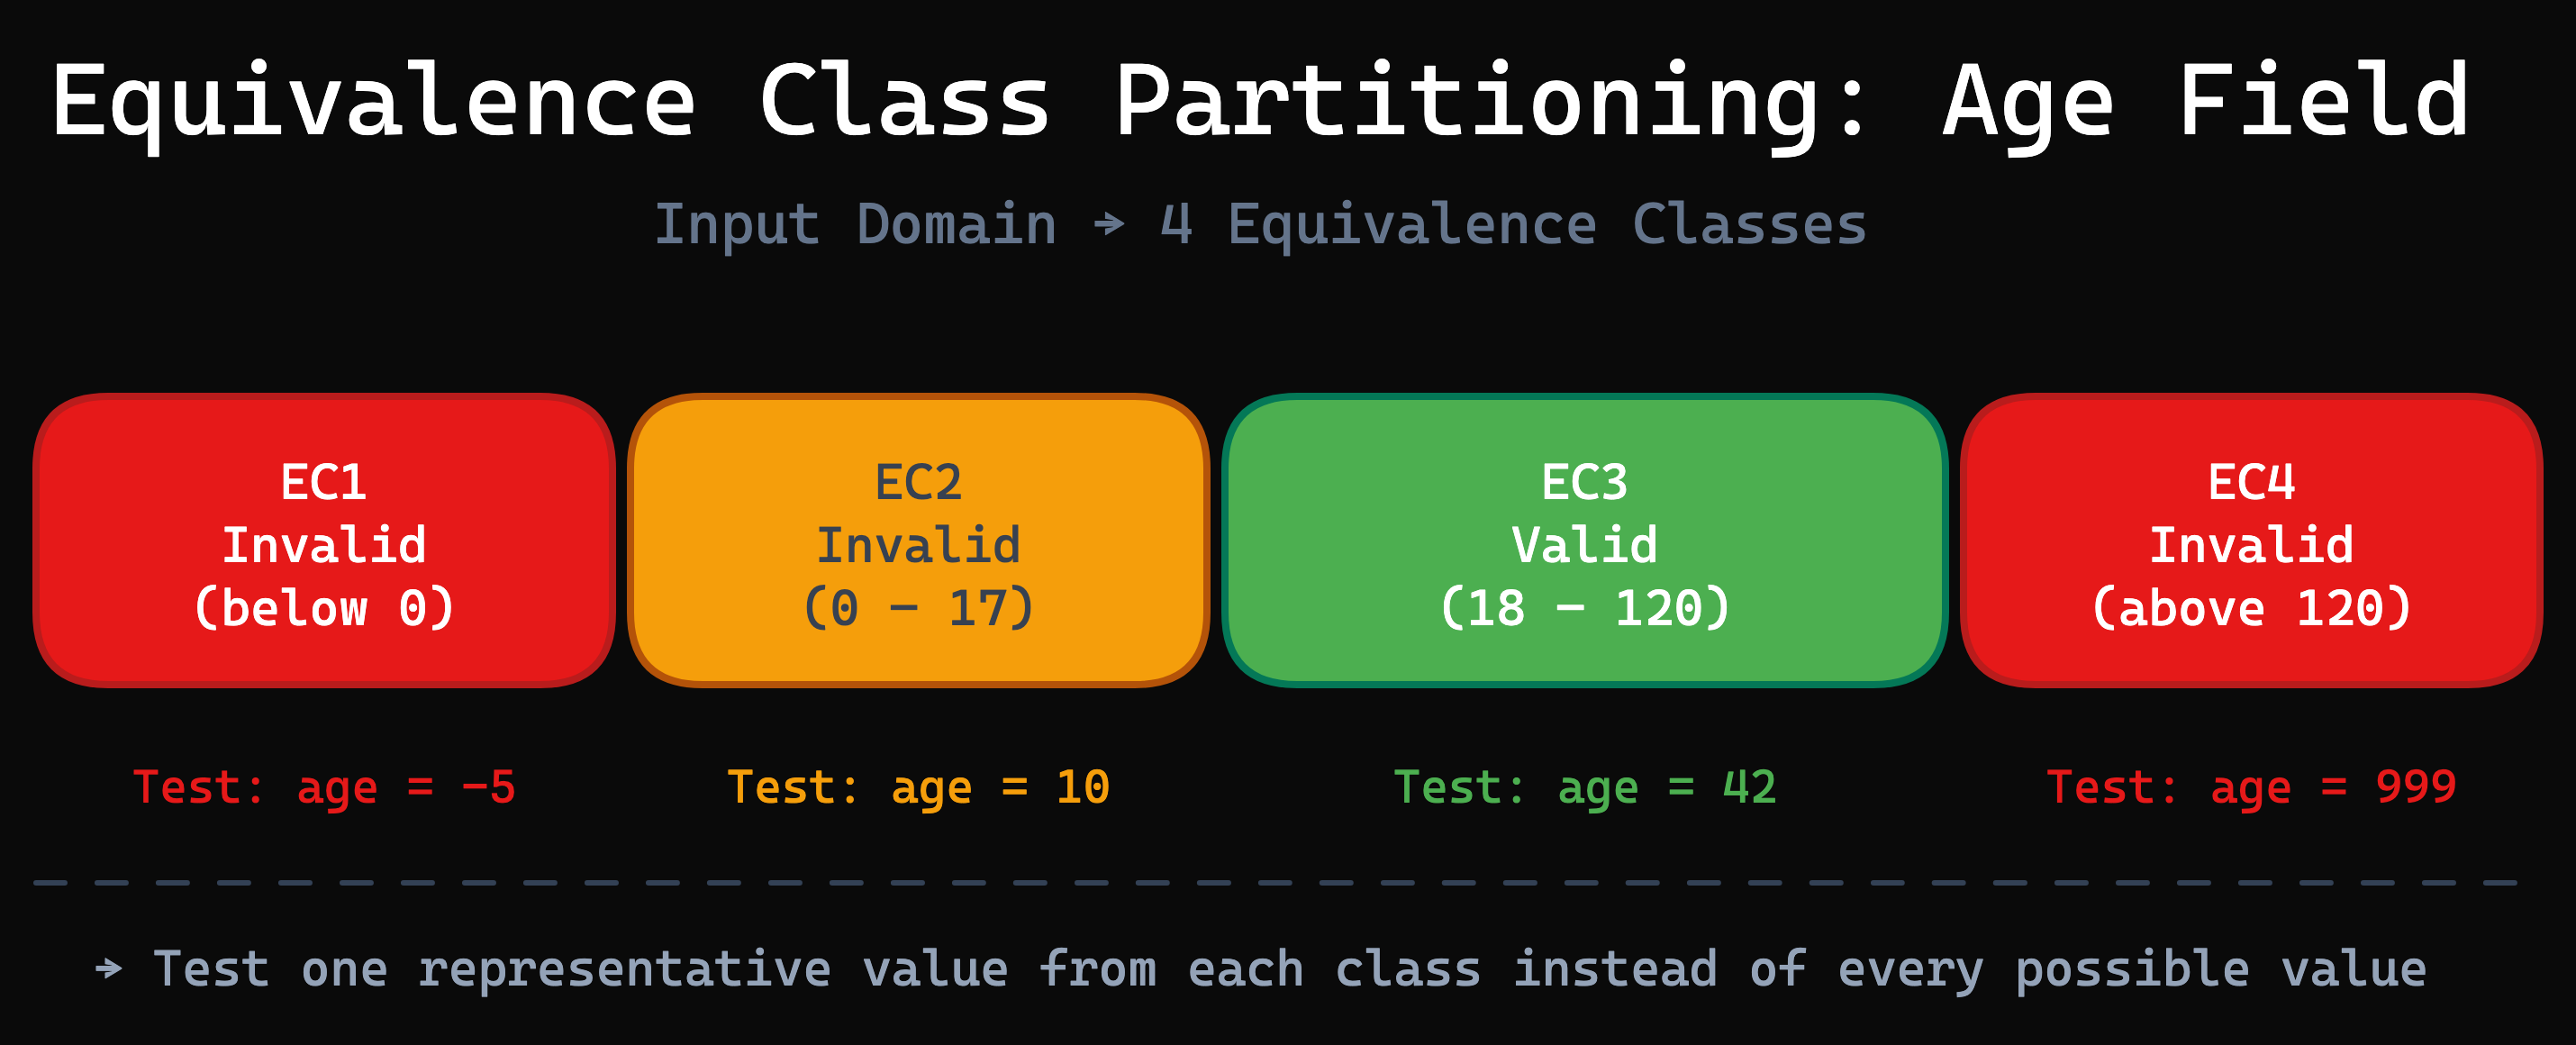
For the age field, we identify four equivalence classes:
| Class | Range | Type | Expected Behavior |
|---|---|---|---|
| EC1 | below 0 | Invalid | Error: invalid age |
| EC2 | 0 – 17 | Invalid | Error: must be 18 or older |
| EC3 | 18 – 120 | Valid | Registration succeeds |
| EC4 | above 120 | Invalid | Error: invalid age |
We do the same for email (valid format, invalid format, empty) and country (supported, unsupported, empty). Each combination of one class per field produces a test case.
Step 3: Build the Equivalence Class Table
An equivalence class table (ECT) organizes all fields, their classes, and the test cases in a single spreadsheet. Each column is a test case; each row is a field. An “x” marks which class to use for that test case.
This is exactly the format that Nanook reads from Excel, LibreOffice, or Google Sheets. The spreadsheet is your test specification — there is no separate step to translate it into code.
Equivalence Class Testing vs. Boundary Value Analysis
Boundary value analysis (BVA) is a complementary technique that focuses on values at the edges of equivalence classes — the boundaries where behavior changes. While equivalence partitioning selects any representative value from a class, BVA specifically tests the minimum, maximum, and values just inside and outside each boundary.
| Aspect | Equivalence Partitioning | Boundary Value Analysis |
|---|---|---|
| Focus | Representative values from each class | Values at class boundaries |
| Number of tests | One per class | Multiple per boundary |
| Best for | Reducing total test cases | Finding off-by-one errors |
| Complexity | Lower | Higher |
| Coverage type | Broad functional coverage | Edge case coverage |
In practice, the two techniques work best together. Define your equivalence classes first, then add boundary value tests for the most critical fields. Nanook supports both within the same equivalence class table.
Worked Example: Testing a Login API
Let’s walk through a complete example. A login endpoint accepts two fields:
userId and password. For each field, we define three equivalence classes:
userId classes:
- Empty (no value provided)
- Non-existent user ID
- Valid user ID
Password classes:
- Empty
- Wrong password
- Valid password
With 3 classes per field and 2 fields, we get a maximum of 3 × 3 = 9 test cases. Without equivalence partitioning, you might write dozens of ad-hoc tests and still miss combinations. With it, you know exactly which 9 cases cover all class combinations:
| Test Case | userId | Password | Expected Result |
|---|---|---|---|
| TC1 | Empty | Empty | Error: userId required |
| TC2 | Empty | Wrong | Error: userId required |
| TC3 | Empty | Valid | Error: userId required |
| TC4 | Non-existent | Empty | Error: password required |
| TC5 | Non-existent | Wrong | Error: invalid credentials |
| TC6 | Non-existent | Valid | Error: user not found |
| TC7 | Valid | Empty | Error: password required |
| TC8 | Valid | Wrong | Error: invalid credentials |
| TC9 | Valid | Valid | Login successful |
This is the exact table from the Nanook Quickstart. Each test case is fully defined by the combination of equivalence classes.
Automating Equivalence Class Testing with Nanook
Nanook is an open-source toolkit that reads equivalence class tables directly from spreadsheets and generates test data for every defined test case. The workflow is straightforward:
- Define your equivalence class table in Excel, LibreOffice, or Google Sheets
- Attach data generators to each class — use built-in generators for common types (emails, names, dates) or write custom generators in JavaScript
- Run Nanook to generate test data for every test case
- Export to JSON, CSV, or any custom format via pluggable writers
Getting started takes minutes:
git clone https://github.com/xhubioTable/quickstart-source.git
cd quickstart-source
yarn install
node src/quickstart.js
Nanook produces one output file per test case. For the login example above, you get 9 JSON files — each containing the exact test data defined by the equivalence class combination. When your specifications change, you simply update the spreadsheet and re-run Nanook. This makes it ideal for CI/CD integration: regenerate test data automatically whenever the specification evolves.
Best Practices for Equivalence Class Testing
- Keep classes mutually exclusive and collectively exhaustive. Every possible input value should belong to exactly one class. No gaps, no overlaps.
- Combine with boundary value analysis for critical fields. Equivalence partitioning tells you which classes to test; BVA tells you where within those classes bugs are most likely hiding.
- Review classes with domain experts. The quality of your equivalence classes determines the quality of your testing. A domain expert can spot missing classes that a developer might overlook.
- Automate the data generation, keep the thinking human. Defining equivalence classes requires judgment and domain knowledge. Generating test data from those classes is mechanical work — let a tool like Nanook handle it.
- Version-control your spreadsheets. Treat equivalence class tables as living documentation that evolves with your codebase.
Conclusion
Equivalence class testing is one of the most effective techniques for reducing test effort while maintaining meaningful coverage. By dividing inputs into classes of equivalent behavior, you can systematically cover all relevant scenarios without an explosion of test cases.
The traditional bottleneck has been generating the actual test data from those specifications. Nanook eliminates that bottleneck by reading your equivalence class tables directly from spreadsheets and producing ready-to-use test data.
Ready to automate your equivalence class testing? Follow the Quickstart Guide to get started in 5 minutes, or explore the full tutorials to see equivalence class tables in action.